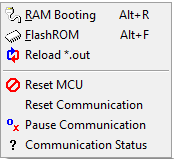
'RAM Booting' menu
It is for MCU booting to RAM area only (NO flashrom area) by using TI SBL UART mechanism.
During RAM booting, easyDSP monitoring in all windows is temporarily paused.
easyDSP doesn't provide SBL UART image file. It provides the method for RAM booting using the given SBL UART image file from either TI or your own.
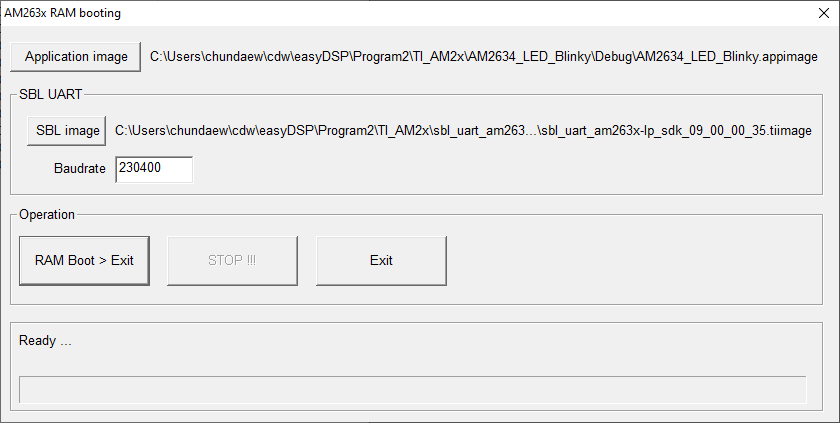
Please follow below steps.step 1 : Please select the application image file to be downloaded to RAM. By default, the app image file which easyDSP is using is selected. But you can change it by clicking 'Application image' button.
step 2 : Please choose SBL UART image file via 'SBL image' button and then input the baudrate of SBL UART.
If you use the prebuilt SBL by TI (the files located in C:\ti\mcu_plus_sdk_am263x_09_00_00_35\tools\boot\sbl_prebuilt folder for example), set the baudrate to 115200.
If you use your own SBL UART, set the baudrate according to your own SBL UART.
step 3 : 'RAM Boot > Exit' button starts booting operation. In case the user program is re-compiled in the meantime, easyDSP detects it and asks you whether you will use new program.
'Stop' button stops any ongoing activity.
'Flash ROM' menu
It programs user program to SPI flash during its development. easyDSP monitoring in all windows is temporarily paused and below dialog box appears.
easyDSP doesn't provide SBL image files themself. It provides the method for downloading SBL and flashing the application using the given SBL image files from either TI (prebuilt SBL) or your own.
Please follow below steps.
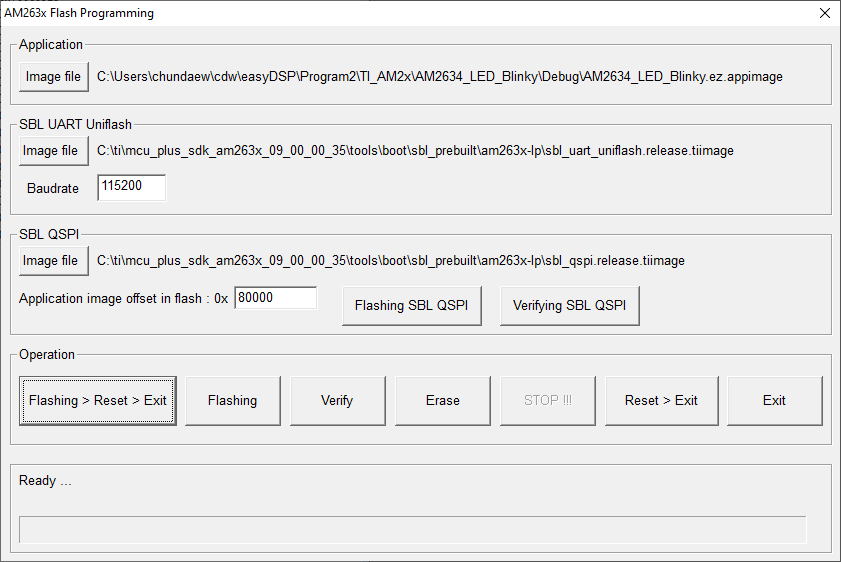
step 1 : Please select the application image file to be downloaded to SPI flash. By default, the app image file which easyDSP is using is selected. But you can change it by clicking 'image file' button.
Please note that easyDSP generates app image file (file extension = ez.appimage) from *.rprc files created by IDE.
step 2 : Please choose SBL UART Uniflash image file via 'image file' button and then input the baudrate of the SBL.
If you use the prebuilt SBL by TI (the files located in C:\ti\mcu_plus_sdk_am263x_09_00_00_35\tools\boot\sbl_prebuilt folder for example), set the baudrate to 115200.
If you use your own SBL, set the baudrate according to your own SBL.
step 3 : Please choose SBL QSPI image file via 'image file' button. And set the offset where the app image will be written to SPI flash.
For prebuilt SBL by TI, the offset is 0x80000. For your own SBL, set the offset accordingly.
step 4 : Flashing SBL QSPI by clicking 'Flashing SBL QSPI' button. Once done, not required anymore until you change the SBL QSPI.
Once all set until step 4, you don't need to repeat the steps.
step 5 : Execute necessary flash actions by clicking buttons in the 'Operation' area.
When the buttons ( ‘Flashing', ‘Verify’ or 'Erase' ) are clicked first time, MCU enters to boot mode after reset and SBL UART Uniflash is downloaded and runs.
Flashing is the successive action of Erase > Program > Verify. So, Erasing or Verifying before/after flashing is optional.
Note that flashing and verifying action is done in 192kB block unit.
step 6 : When exiting this dialog box, use 'Reset > Exit' button. It makes MCU reset and boot with QSPI (4S) - Quad Read Mode. And user program starts.
If you exit this dialog box without MCU reset, MCU still stay in SBL and the easyDSP monitoring will fail.