Below software setting is explained based on PSoC Creator 4.4.
It is assumed that you are already familiar with bootloader and bootloadable. If not please check the manual from Infineon.
Single-application bootloader configuration is required for
easyDSP to access onchip flash of MCU. In other configuration, easyDSP can monitor the
variables but can not program flash.
Below
software setting is explained based on PSoC Creator 4.4.
It is assumed
that you are already familiar with bootloader and bootloadable. If not please check
the manual from Infineon.
STEP 1 : Bootloader project
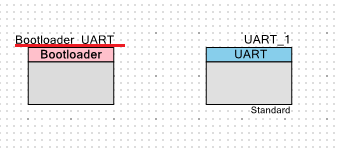
Please make a schematic as below by dragging the compoents from component catalog.
And change the name of bootloader component to Bootloader_UART.
You can add other components if necessary (ex, LED).
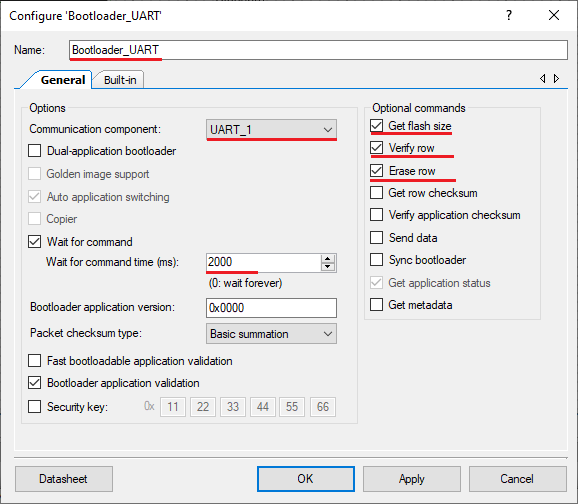
First set the 'Bootloader_UART' component as below capture. Note that 'Wait for command time' should be more than 2000ms.
If required, you can set the security key.
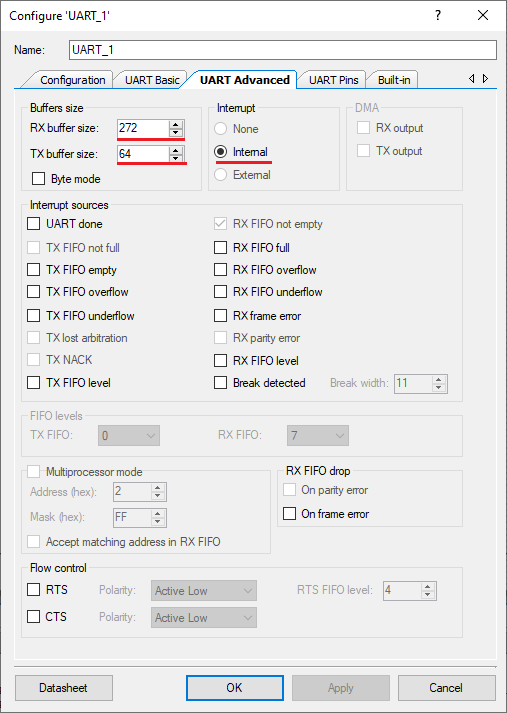
Second set the UART component as below capture. Use 'UART Basic' tab as its default. Note that 115200bps, 8bits, one stop and no parity is used.
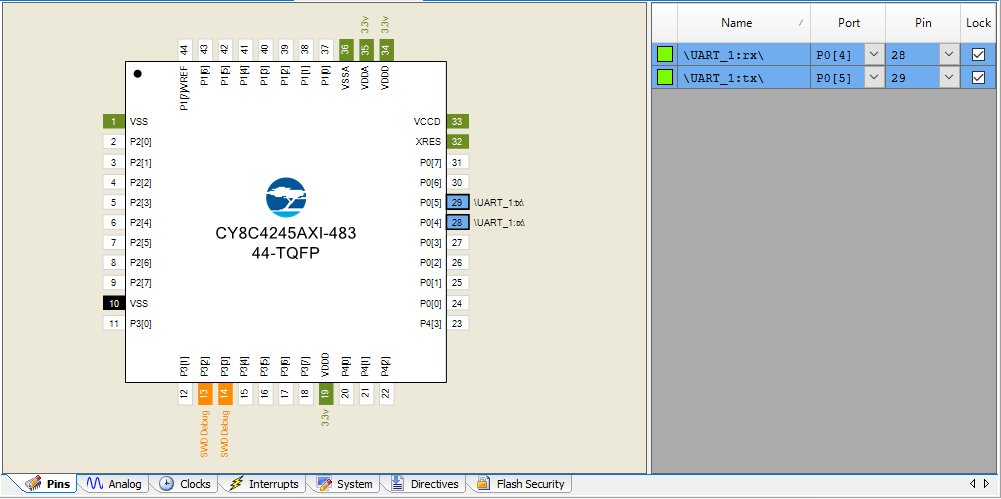
Please select UART pins according to your design. In this example, P0.4 and P0.5 are used.
In 'UART Advanced' tab, buffer size should be changed.
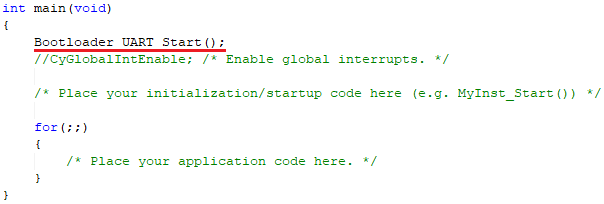
Finally call Bootloader_UART_Start() function in the beginning of main().
With this, all set for bootloader project.
STEP 2 : MCU flash programming with bootloader project
You have to program bootloader project to MCU after compiling bootloader project. If necessary, flash are for bootloader project can be protected.
easyDSP can't program the flash for bootloader project.
Once bootloader project is programmed to flash, easyDSP can program bootloadable project.
STEP 3 : Bootloadable project
Please make the schematic like below from component catalog. Please change the name of UART component to UART_ezDSP.
You can also add other components according to your program (not shown here).

Setting of each component as below :
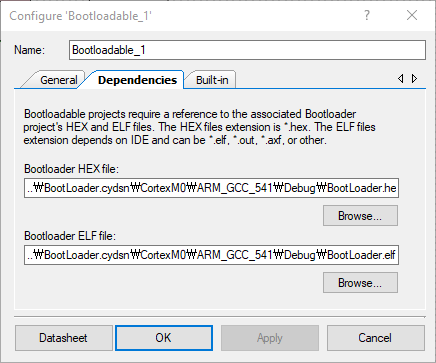
First for Bootloader component. Please use 'General' tab as it is. Also register Bootloader project hex or elf file to 'Dependencies' tab.
Second for UART component.
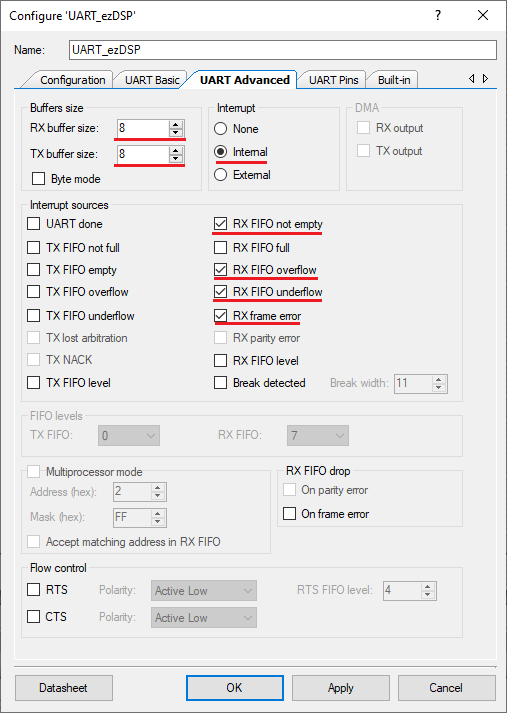
Please set the communication speed (bps) in the 'UART Basic' tab. It should be same to bps setting of easyDSP project. But it could be different from bps of bootloader project above. Also note to use 8bits, no parity, 1 bit stop bit. Also set the parameters of ' UART Advanced' tab as below.
Priority of UART interrupt is recommended to be low not to interrupt higher priority interrupt routine.

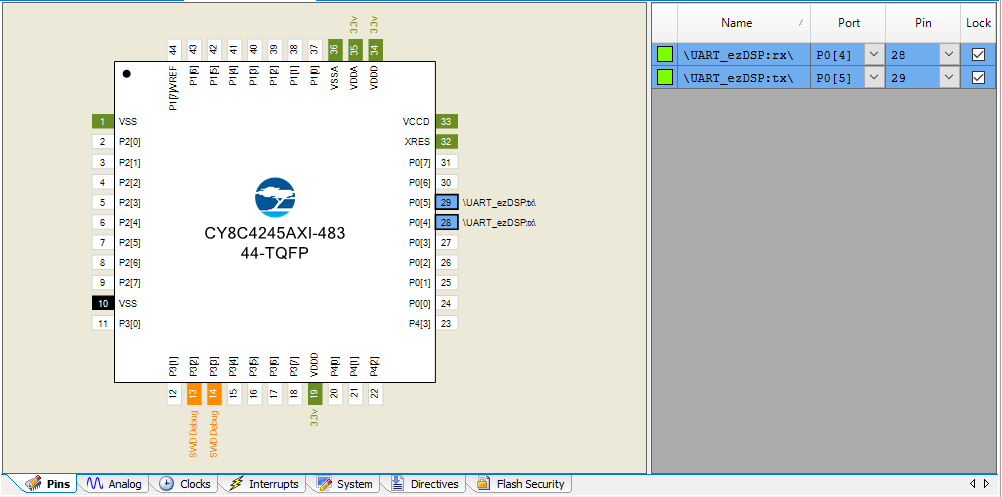
UART pins should be same to pins of bootloader project. In this example, P0.4 and P0.5 are used.
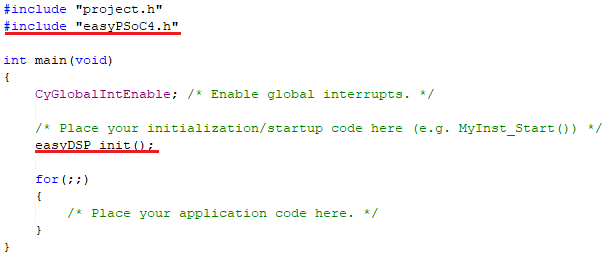
Source files (easyPSoC4.h and easyPSoC4.c) are provided for easyDSP communication. Please include them in your project. You can find them in the folder of easyDSP installation (\source\PSoC).
Finally call easyDSP_init() function in the
main(). Withi this, you are ready to use easyDSP.
STEP 4 : IDE setting
1. For easyDSP to access the variable, the debug information should be included in the output file (ex, *.elf). And the option of assembler, compiler and linker should be set accordingly.
2. *.cyacd file is used for flash programming. So it should exist in the same folder to output file.
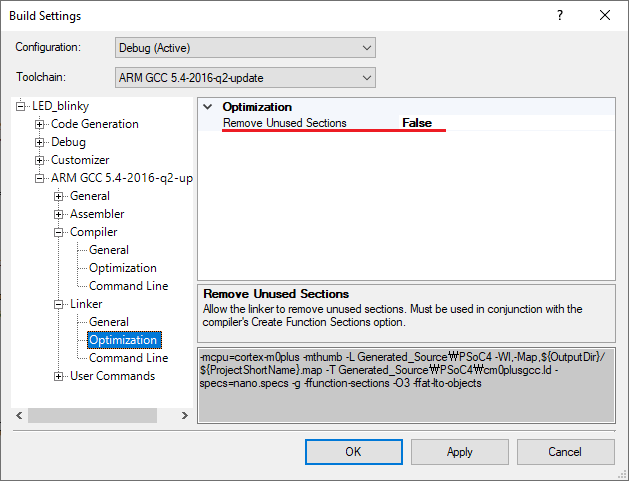
3. The unused variables could be excluded from the debug information depending on compiler's optimization level and linker setting. If necessary, you can set the linker option so that the unused variables are not excluded. For example, in PSoC4 creator, set the 'Remove Unused Sections' false.
