XMC1 setting
Hardware
Please connect
easyDSP
header RX and TX
pins to directly UART pins (either P1.3/P1.2 or P0.14/P0.15 pair).
RX and TX
pins of easyDSP header are pulled up with 100kOhm resistor in the
pod.
Also connect easyDSP header #4 pin to
VDDP.

Modification of easyXMC1.h file
Two files are provided for easyDSP communication
(easyXMC1.h and easyXMC1.c). Please include them in your project. You can
find them in the easyDSP installation folder (\source\XMC).
Since XMC Peripheral Library is used in the files, this
library should be included in your project.
And modify easyXMC1.h file according to your target USIC channel and
baudrate.
The baud rate should be same to that of easyDSP project.
Also allocate 8 receive FIFO buffer
and 8 transmit FIFO buffer to the channel of USIC easyDSP uses while avoiding
conflict to FIFO buffer of the other channel of USIC
module.

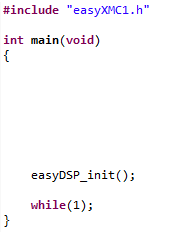
Calling easyDSP_init()
Pleae include easyXMC1.h in the top of main.c and
call
easyDSP_init() in the
main().

IDE
setting
1. For easyDSP to access the variable, the debug information
should be included in the output file (ex, *.elf). And the option of
assembler, compiler and linker should be set accordingly.
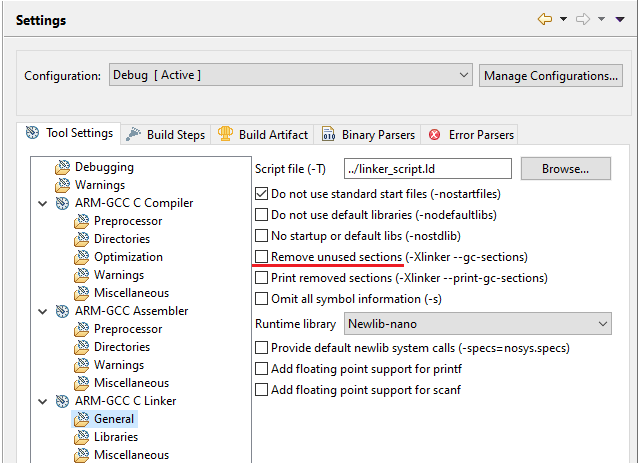
2. The unused variables could be
excluded from the debug information depending on compiler's optimization level
and linker setting. If necessary, you can set the linker option so that
the unused variables are not excluded. For example, in the Dave, set
the 'Remove Unused Sections'
unclicked.

Others
1.
Whenever the MCU flash is programmed with a debugger, you
must update the variable information by running the 'MCU > Load Symbol'
menu  .
.


 .
.